Brewing Process Diagram
View:
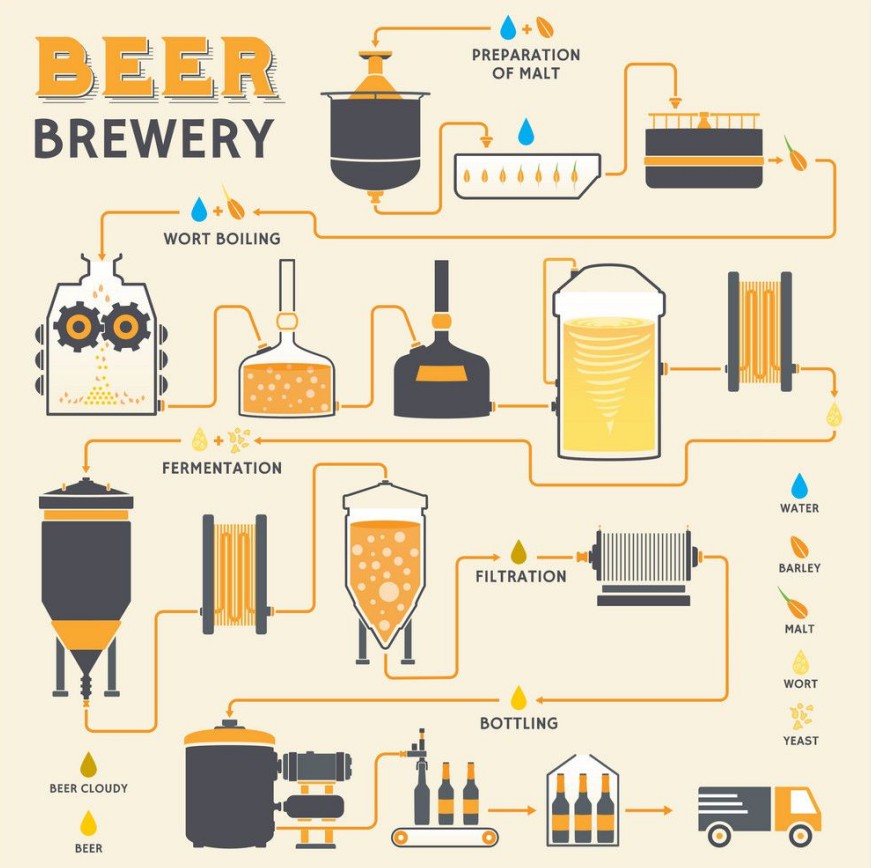
The brewing process diagram is a great way to see how beer is made and to get an understanding of the different steps involved. It's also a handy tool for those who are new to brewing. If you're new to brewing, or just want to get a quick understanding of the brewing process, then a brewing process diagram is a great place to start. There are a few different ways to make beer, but the most common method is the two step process. The first step is to make the wort, which is the liquid that will become beer. The second step is to ferment the wort, which turns it into beer

Beer production process flow chart and introduction.
Step 1 - Malt Milling
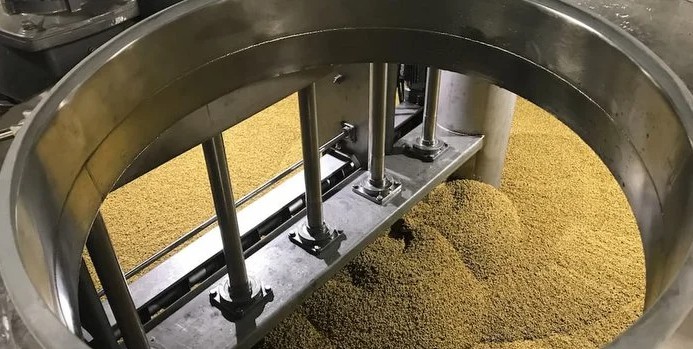
10 minutes before crushing, add 5% of the malt weight of water to moisten the surface of the malt, and when there are no obvious water droplets on the surface of the malt it can be crushed. Add the malt into the hopper and start crushing. During the crushing process, take samples at any time to detect the crushing of the malt, and adjust the distance of the grinding plate and the feeding volume appropriately according to the coarseness of the crushed malt, with the ratio of coarse and fine particles being 1:2.5.

Step 2 - Paste process
Add the right amount of water (about 20Kg of water according to the measurement of 12°P wort) in the paste pot, turn on the steam heating, raise the temperature to 50℃ and stop heating. Start stirring the paste pot, put crushed rice flour (measured by 12°P wort, about 5Kg) and malt flour (15% of rice flour, about 0.75Kg or add amylase) into the paste pot and keep warm at 50℃ for 20 minutes. Turn on the steam heating and raise the temperature to 70℃ at a rate of 1-1.5℃ per minute, and keep warm for 20 minutes. From the beginning of feeding to the end of pasting, stirring is turned on from the beginning to the end to prevent paste pot.

Step 3 - Saccharification process
Start stirring in the scarification pot, put the crushed malt powder (measured by 12°P wort, about 12Kg) into the scarification pot, stir well, stop stirring, and keep it at 37℃ for 20 minutes. Start stirring, turn on steam heating, and heat up to 50℃-55℃ at a rate of 1-1.5℃ per minute, stop stirring, and hold at rest for 40 minutes for proteolytic. At the end of proteolytic rest, start stirring, pump the paste mash into the scarification pot, heat up the mash to 65℃, stop stirring, and keep warm for 70 minutes for scarification.
Step 4 - Raise temperature to inactivate enzyme
start stirring, turn on steam heating, raise temperature to 78℃ at a rate of 1-1.5℃ per minute, stop stirring, stand still for 10 minutes, and wait for filtration.
Step 5 - Filtration process
start mashing and filtration stirring, pump the mashing into the filtration tank, pump the mash and stop stirring when the mashing is uniform, and stop 10-15 minutes to let it form a natural filtration layer. After the resting time, open the filtering material valve and reflux valve, start the filtering pump, make the wort reflux in the filtering tank for 5-10 minutes, pay attention to the reflux, the flow rate of the pump is adjusted to 20%-30% of the maximum flow rate. After observing the wort clear through the sight glass, close the reflux valve, open the filter valve to the scarification pot, and pump the wort into the scarification pot. After 20 minutes of filtration, take a sample to measure the concentration of the original wort.
Step 6 - wort boiling
the end of wort filtration, open the steam valve, start boiling, wort boiling is to start timing, boiling time of 90 minutes, the wort is always in the boiling state; control the boiling end wort concentration, if the concentration in the specified time to meet the requirements, can be extended. Wort boiling open for 5 minutes and 10 minutes before the end of the boil, respectively, add bitter and aroma hops, heating respectively 40g (0.04%) and 20g (0.02%).
Step 7 - Wort spinning and sinking
At the end of boiling, close the steam valve, open the discharge valve of the scarification boiling pot and the tangent line inlet valve, turn on the wort pump at the same time, beat the cycle in the scarification pot for 10 minutes, and settle for 30 minutes, then cool the wort.
Step 8 - Wort cooling
the wort after boiling is pre-chilled to -6 degree Celsius ice water tank (ethanol and water as mixed medium) through the heat exchanger fittings quickly cooled to the fermentation temperature, the fermentation temperature varies according to the different commercial yeast, commonly used in general below 20 ℃, most of them are in the range of 9-15 ℃.

Step 9 - Add yeast and beat into wort:
Add yeast activated in advance quickly to the disinfected pipe in advance, and use the pump to pump the wort cooled to about 9℃ to the fermentation tank in the process of adding yeast to the fermentation tank. After all the wort is pumped into the fermentor, continue to pass in oxygen for about 5 minutes to dissolve enough oxygen in the wort.
Step 10 - Fermentation
Into the fermentor is the wort concentration of about 9-12°P, pre-fermentation is about 4-5 days, the concentration of wort drops to about 4.5°P, no need to control the pressure in the tank, if the environment is clean, you can open fermentation. Post-fermentation, mainly anaerobic fermentation, must keep the tank sealed, temperature control at 12-15 °C, keep fermentation for 7-10 days, let it naturally rise to about 0.1kpa, when post-fermentation to no obvious acetyl taste, fermentation is over.
Step 11 - the end of cooling
when the fermentation is over, it should be cooled down, the speed should not be too fast, with a gradient of about 1-0.5 ℃ per hour down to about 2 ℃. If the cooling speed is too fast, it will cause the liquid next to the jacket to freeze easily, so that the yeast and some residues cannot settle naturally, resulting in the beer being cloudy easily.
Well, the above on the "beer production process flow chart and introduction, who invented the beer" related to the introduction, I can not find it to say here, I believe that after reading it should all have an understanding of the beer production process! If you want to do it yourself, you may wish to refer to the production process flow chart in the text, I hope you can help.
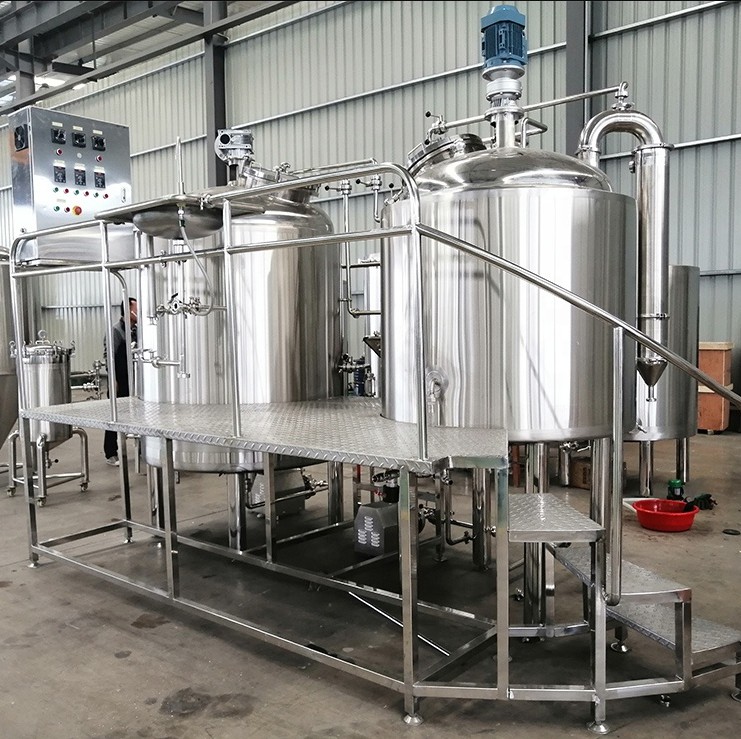
if you are ready to open a craft brewery, you can contact us. Ace’s engineers will provide you with a list of craft brewery equipment and related prices. Of course, we can also provide you with professional turnkey brewery solutions, allowing you more time to focus on brewing delicious beer. Ace very much hope to cooperate with you, my friend!
